 当然のことながら、thisポインタはconstポインタですから、
これに、代入を行ってはいけません。
 さて、クラスAに対して、
というポインターが自動的に定義されます。 これは、メンバ関数からアクセスできます。 早速例題を見てみましょう。A* this;
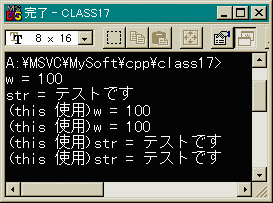
このプログラムの実行結果は次のようになります。 thisポインタの使い方をよく見て下さい。 特別難しいことはないでしょう。#include <iostream.h> #include <string.h> class A { int w; char str[32]; public: A(); void test(); }; A::A(void) { w = 100; strcpy(str, "テストです"); } void A::test(void) { cout << "w = " << w << endl; cout << "str = " << str << endl; cout << "(this 使用)w = " << this->w << endl; cout << "(this 使用)w = " << (*this).w << endl; cout << "(this 使用)str = " << this->str << endl; cout << "(this 使用)str = " << (*this).str << endl; return; } int main(void) { A renshu; renshu.test(); return 0; }
 当然のことながら、thisポインタはconstポインタですから、
これに、代入を行ってはいけません。
また、*thisをメンバ関数の戻り値として扱うこともできます。
その例を見てみましょう。
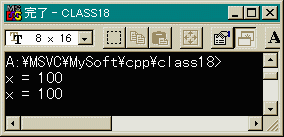
上の例題の意味が分かったでしょうか。クラスA のメンバ関数show()の戻り値の型は、Aとなっています。 従ってこの関数の戻り値をクラスAのオブジェクトに 代入することができます。上のプログラムの実行結果は 下に示すようになります。#include <iostream.h> class A { int x; public: A(); A show(); }; A::A(void) { x = 100; } A A::show(void) { cout << "x = " << this->x << endl; return *this; } int main(void) { A test1, test2; test2 = test1.show(); test2.show(); return 0; }

 今までの知識で、かなり複雑なプログラムが書けるように
なったはずです。どんどんプログラムを書いて下さい。
特別、スマートなプログラムを書く必要はありません。
見かけが悪くても、自分で理解のできるプログラム
を書きましょう。
Update Jan/24/1997 By Y.Kumei